Showing posts with label Chaos Daemons. Show all posts

2015-04-10

Green bushes with red strawberries

As I am too tired to write a battle report and my smartphone's battery ran empty in mid game, I won't do a proper battle report of our latest game, but just show off the most epic photos of our Blood Angels & Elysians vs. Khorne Daemons matchup.

Building secured!

You know things may go sour when an Inquisitor watches over the field.

New aim!

Sergeant, why does this sand keep following us???

Eesh, I shouldn't have left the door to the kennel open!

See?

Shhhh, I'm huntin' wabbit!

I love the smell of Promethium in the morning!

Incoming!


2015-02-15

Save our souls


Belamor, Sanguinary Priest of the 2nd Blood Angels battle company, didn't believe his eyes as he watched Khorne Daemons charge the Tyranids with his very own men. After suffering heavy losses from the Daemons, Belamor regrouped his men, improvised a field hospital for the wounded, had the most urgent repairs done on the Baal Predators, and had hoped that all this will be good enough before reinforcements arrive. Just then his farthest outpost radioed in a sudden contact with Tyranids seemingly coming out of nowhere and as his tired men mounted their defensive fire, the Daemons were back all of a sudden as well. However, this time they slid past the Marines and directly charged the alien creatures. What in the Emperor's name was happening on Teritarius Secundus?

Welcome to my battle report where 745pts of Khorne Daemons and 751pts of Blood Angels fight it out with 1500pts of Tyranids. Come the Apocalypse!

This is how we set up. BA and Daemons had to start minimally 12 inches apart from each other which was more of a restriction than I thought it's going to be.

This was the end of the allied turn 1. The Baal Predators immediately moved to the flanking MOs and the Greater Daemon ran up the middle eager for blood.

BA and Daemons scored 1 VP because we were lucky enough to sit on one MO where we had the corresponding Maelstrom card.

On the Tyranids turn 1, the Hormagants were closing on on the Greater Daemon. "No problem", thought the Greater Daemon, but just as he was done thinking, the three Carnifeces' Heavy Venom Canons sent him back into the Warp.

The rest of the Tyranids spread out.

After turn 1 the Tyranids lead 1:2 because of First Blood and a slain warlord.

On the Allieds' turn 2, one unit of Bloodletters deepstruck in the upper left corner followed by the running up Chaos Hounds...

...whereas the second unit deviated 10 inches and materialized right in front of the Tactical Squad's Bolters in the lower right. They also failed their "Come the Apocalypse" roll so they sat there for the rest of the turn doing nothing as they were sceptically eyeing the Blood Angels for any sign of treachery (ha ha ha!).

The tanks moved up to hold the center and create space for the Bloodletters, but the Rhino got immobilized in the difficult terrain.

The beauty in this picture is the two missing Zoanthropes. From my earlier games with Goldark I remembered their dangerous yet squichy nature, so I put all tank fire into them.

Because we had a maelstrom card saying "kill one entire unit" and a Zoantrope counts as a unit, we tied on VP.

The start of the Tyranids turn 2 had the Bloodletters shit their non-existing pants when the Tyranid Drop Pod with a Tyrannofex landed right in front of their noses.

After the shooting phase, of said Bloodletters only three had survived (lower left corner in the picture and one of the Baal Predators was gone. In the upper left of the picture you can see one half of the 3rd Tactical squad in their Rhino and the second half on the bridge between ruins, both still unharmed. This was partially true because the missing Zoanthropes left the Tyranids in the center without any synapse creatures, so the Hive Tyrant had to jump back and land into the center to keep its units focused.

At the end of the Tyranids 2nd turn, no changes in VP.

At the beginning of the Allieds' turn 3, the frist half of the 4th Tactical squad exited their Rhino to claim the center. After that, every unit sunk their fire into the Hive Tyrant, but soon only the Hormagants surrounding him were left. That the Hive Tyrant had to land there proved to be a huge game changer because now the Tyranids had no synapse creature left in their army!

This Bloodletter was an idiot, but still brave enough to charge that Tyrannofex.

Even the bigger idiots were these Bloodletters charging that Sporocyst which promptly exploded into their face.

Yet at the end of the Allieds' turn 3 things looked quite good for us because we had the better board control plus the Tyranids had no friggin' synapse creature (I don't get tired of saying that)! At this point, our opponent called the game pretty much over and didn't roll his dice anymore as cheerfully as during previous turns. However, I assured him that the game ain't over before the last turn has been played which is so true with Maelstrom Missions.

One thing I wasn't happy with was that we couldn't convert our board control into VP. We hardly ever pulled cards saying "hold MO #whatever" (of which we held plenty), but stupid stuff like "sacrifice your warlord" which simply wasn't feasible, so at the end of the Allieds' turn 3 we only got 1 point to lead over the Tyranids.

The start of the Tyranids turn 3 meant saying hi to this Mawloc unburrowing in the center right in front of one half of the 4th Tactical Squad.

The Drop Pod moved in to singlehandedly kill off the other half of the 4th Tactical Squad. I guess this isn't how Space Marines envision their deaths.

A similar unheroic death arrived for the first half of the 4th Tactical Squad: The Mawloc didn't even turn his head and instead they got run over by Hormagants.

Luckily we were able to score on the Tyranids turn because we held one MO where our opponent had the corresponding card so now it was 4:2.

The Allieds' turn 5 had us everything commit towards the center. While we still had assests, the 4th Tactical Squad still untouched in its Rhino and up on the gallery, one unit of Bloodletters plus most notably the Baal Predator, we didn't have much to deal with the Tyranids' Monstrous Creatures.

Consequently, the last Marine of the 5th Squad plus the Bloodletters advanced up to the Carnifeces, but didn't do any harm.

The 4th Tactical Squads' moved back under the bridge again to score on a MO...

...to give us a four points lead.

The Tyranids turn 5 saw the flattening of the remaining Bloodletters and the lonely Marine.

Thankfully the Baal predator got ignored...

...and the Tyranids only got one VP, so at this point we could have won the game. However, the dice gods said that we were about to play a turn 6.

Turn 6 saw the remaining Bloodletters die against the Carnifeces and the Baal predator get immobilized by again the same crater as it was unloading all its guns and Heavy Flamers into the Tyrannofex.

The score remained the same as once again we the Allies didn't have any meaningful Malestrom cards on our hands.

The Tyranids turn 6 had everyone close in on the Baal Predator, kill it, and because of the right Maelstrom cards rise from 4 to 7 VPs...

...plus 1 VP for scoring Line Breaker in the end with that stupid Drop Pod. ðŸ˜„

This game was devastating for the Blood Angels/Khorne Daemons Allies as they had board control plus Tyranids running around with no synapse creatures, yet the Allies lost. Had this not be a friendly and casual game, the Allies should be totally ashamed of their performance. A key factor surely was the inefficient use of the Khorne Daemons; the Greater Daemon died too early and with him our only hope against the Tyranids' Monstrous Creatures. The Bloodletters proved to be extremely fragile against Overwatch fire, so they were sort of a disappointment, too.

Another interesting insight was to see how "Come the Apocalypse!" Allies perform on the field. The 12 inches of space required when setting up prior to the game makes it difficult to set up for a tactical advantage. Plus the Winds of the Warp didn't only work against the Tyranids, but also the Blood Angels - much hilarity ensued when Nurgle's Rot befell three Blood Angels units, but not Tyranids in one turn. In other words, it's easy to die from your own "allies".

PS: Sun Tsu added some corrections, please check the comments below. They are the result of me not knowing the Tyranids Codex well enough, not grasping every action during the game despite trying to pay attention, and writing the battle report several days after it has happened. ðŸ˜„

Belamor and the 5th Tactical Squad watched in horror as both their battle brothers plus the Daemons dissolved in a sea of claws and bioacid. They fired their Bolters in support of their brothers in no avail. When the dust of battle had settled, the Tyranids were retreating as well - surely just to regroup and come back later leaving no hope for the remaining 5th Squad. However, there was one thing Belamor feared more than the return of the Tyranids: proving to an Inquisitor that he and his squad hadn't been touched by Chaos...

2015-01-03

An unexpected ally on Teritarius Secundus

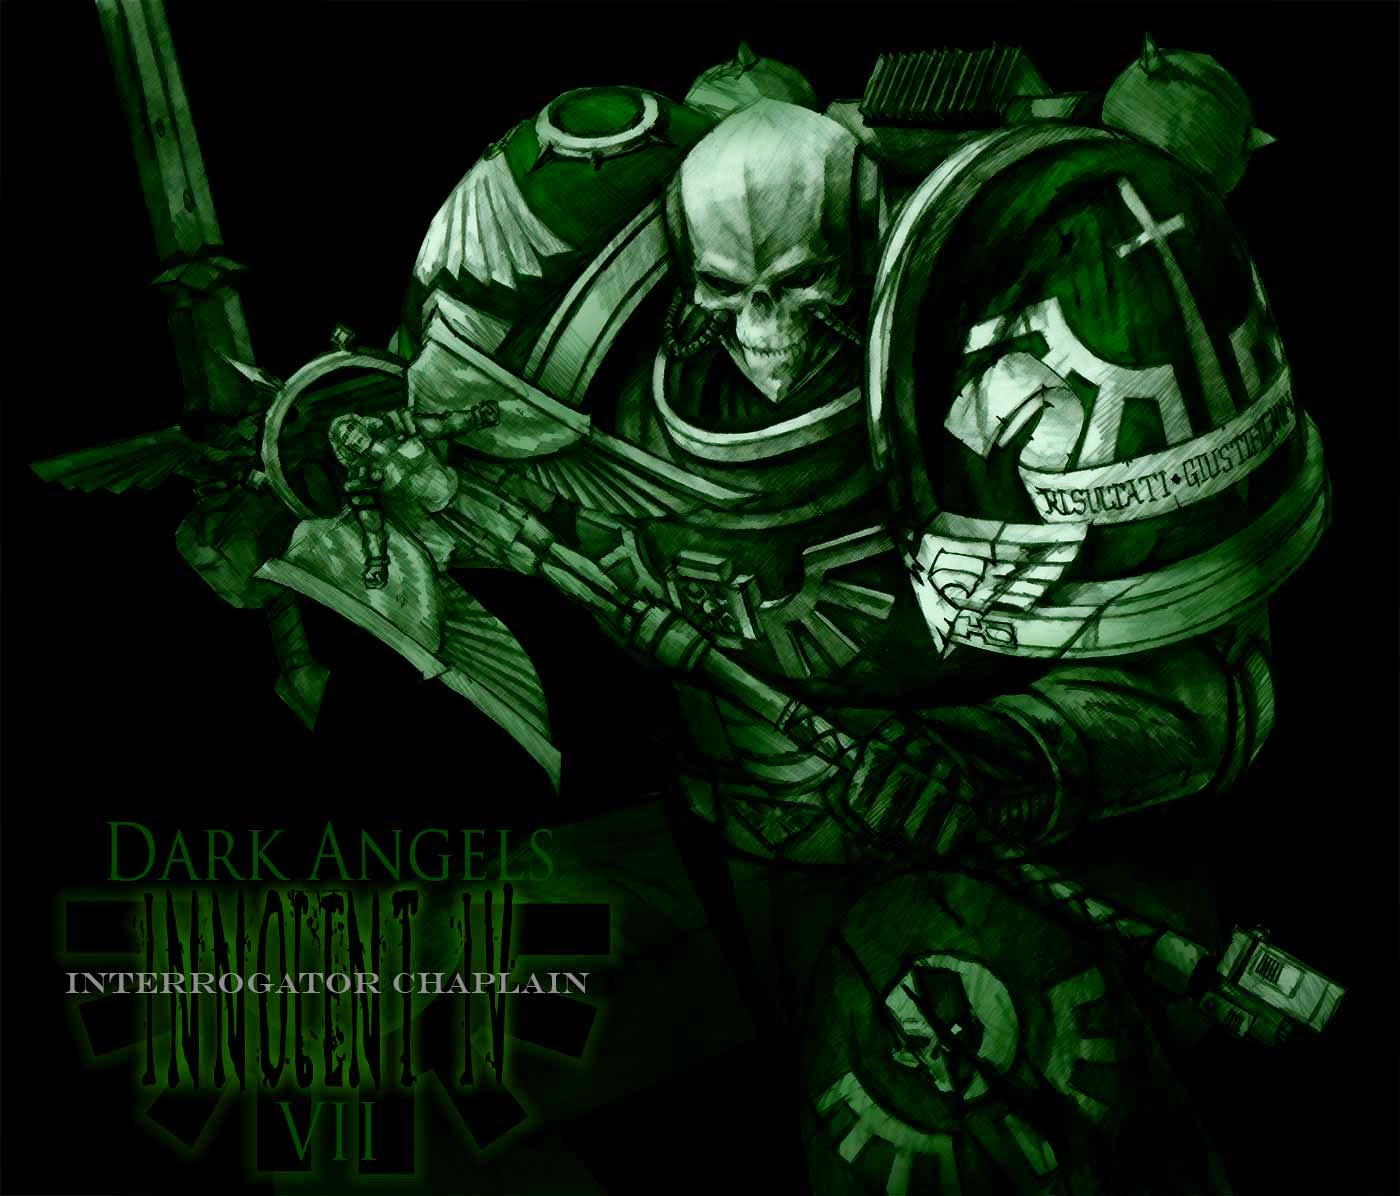
Dark Angels Interrogator Chaplain by tacticangel on deviantart

Begin of transmission:

Brother Parcival
We have received your distress signal
By the Emperor's will, Brother Seraphicus is in the immediate vicinity of your sector on... unrelated business
He shall rain down fiery absolution the likes of which that world has never seen
Stay strong, and hold out

End of Transmission.

This game was about loyal Space Marines (Blood Angels 500pts, Dark Angels 1'000pts) versus Chaos Daemons (1'500pts) in continuation of the first installment Ambush on Teritarius Secundus. I played the Death Company (with an ordinary Chaplain) and the Furioso remaining from the previous game in an Unbound formation, Tudor was throwing in a Ravenwing heavy DA expeditionary force lead by Interrogator Chaplain Seraphicus. Sven was playing his unmodified Chaos Daemons list (except for some weapon alterations) from the previous game.

This is how the game was set up with BA and DA at the southern edge.

On the left flank, the Furioso immediately moved forward to be within 3" of the Mission Objective (MO) behind the corner to his right. Unfortunately, the Daemon Prince (DP) is already looming at the horizon.

The Death Company (DC) moved towards the center...

...and so did the Ravenwing (RW) on the right flank.

Because the Marines already held 3 MO by the end of our turn 1, we already lead the score 3:1.

On the Daemons' turn 1, the Juggernauts didn't waste time to charge the RW...

...but the dice said the DP was out of charge range and - crucially - not contesting the MO.

The RW ate up the damage, swung back and left one single wounded Juggernaut.

To make matters worse, we were able to score another point on the Daemons' turn while they scored none.

The begin of turn 2 saw me do something very coward with the DC by letting them fall back and wrap the DA Tactical Squad (TS) that proved to be more and more important. With Bloodthirsters deepstriking this turn, it was available to not let our rear totally unguarded. Also, quick calculation showed that the DC had no means to harm the monstrosity on the other side of the crater (except for the Chaplain glancing on sixes). The Deathwing (DW) Knights teleported in right in the center of the table and were going to take care of that instead.

However, rather than just waiting for the DW, the RW decided to take matters into their own hands and wounded the machine with their Plasma Gun.

On the right flank, the DW made clear who's the boss and moped the floor with the remaining Juggernaut.


The Furioso charged the Daemon Prince, but left him alive with 2 Wounds remaining and suffered an Immobilized result in return.

Because we were comfortably holding MOs, our points count rose to 6.

From my point of view, at the beginning of the Daemons' turn 2 it payed off I let my DC fall back - only one unit of Daemons arrived from reserves and they defensively deepstruck into their own backyard to an unguarded MO.

The Monstrosity continued to battle the RW...

...the DP destroyed the Dreadnought and moved onto MO #2...

...for the second point for the Daemons. Luckily, our counter rose as well to a 7. (the orange dice has already been turned to turn 3 here, but this is the result from the end of turn 2)

Turn 3 saw the DC move out again to meet that DP who had to be taken care of...

...which was an acceptable risk as the DA Scouts,...

...the DA TS...

...and the DA Interrogator Chaplain kept shoveling points onto our account.

Part of the DW moved forward to fire at the freshly arrived Daemons,...

...the DC battled the DP and (important!) was able to score on MO #2 again,...

...and the combined efforts of the RW and DW finished off this Monstrosity on two legs.

All this scoring allowed us to break away to a lead of 8 pts.

With the DC at the center of the table engaging the DP, these Daemons did what they had to do and arrived in the TS back. The DW Knights in the upper left corner, however, already prepared to come back and help their brothers on MO #1.

The main host of the Daemons from the previous turn charged the DC and made them suffer heavy losses...

...whereas their Champion decided to confront the RW.

Unfortunately, this was a bad idea and although they suffered heavy losses, the RW continued to sit on MO #3.

By now, the number of Marines were decreasing with every dice rolled, but the Daemons still couldn't significantly score on MO.

The beginning of the fourth turn witnessed the Interrogator Chaplain throwing a Frag Grenade at the Daemons from the previous turn. It was the first time anyone at the table ever witnessed a Frag Grenade actually being thrown!
The Snipers fired at the Daemons, too,...

...and the TS thinned out their numbers as well...

...until the DW charged in to keep the backyard clean.

Not as favorable was the close combat for the DC, by turn 4 they fulfilled their purpose and were now fully gone with the DP left at 1 counter.

Things started to get obscene by the way we kept trucking in victory points despite the Daemons relentlessly pressing.

The Daemons' turn 4 saw them defensively deepstrike again.

Much worse, the Winds of the Warp (WoW) dealed Nurgle's Rot to the Scouts and they were gone in an instant, leaving our MO #4 unoccupied after it delivered so many valuable points. Was this the turn of the game and a crazy comeback for the Daemons?

They charged the DW on all fronts...

...and the DP quickly reduced our TS on this MO...

...to their valiantly fighting Veteran Sergeant (VS).

Still it appeared like the Daemons' counter was hardly moving at all.

The Loyalists turn 5 saw mostly this close combat here with further decreasing numbers on their sides, but the remaining Marines stood strong and did not yield.

However, we didn't score any points this turn.

The aforementioned close combat continued in this round reducing the Loyalists to one DW Knight still refusing to fall.

Yet again, a lone DW Biker moving to the right flank edge in order to avoid being killed and granting the Daemons a total victory by killing all Marines...

...scored in this turn again bringing us up to 13.

In turn 6, the game was pretty much over and the Daemons dominated the battlefield...

...yet our hero DW Knight finally killed off the DP and reduced this  champion's Daemon host to himself alone.

The evading DW bikes still continued to give us points from MO...

...while the Daemons now were able to get important points themselves, but the game ended after turn 6 with the final score of 16 : 8.

Conclusion

Once again, the game was truckloads of fun because of the Maelstrom Missions that required you to make the best out of every new situation and because Sven simply is such a great sport - at a tournament he'd easily get the prize for best sportsmanship!

In terms of the meta game, I can see why everyone and their grandmother are playing Green/Blue/Red White Scars these days as bikes really are strong in 7th Edition. They move fast, making them ideal to the ever changing flow of MO grabbing, plus their Toughness 5 makes them very resilient. Yet I won't play any bikes soon as I neither have the money for the models nor do I consider them exceptionally fluffy for the BA.

In terms of the campaign, the BA got finally wiped out on the surface of this planet, yet their remaining force fell honorably assisting the DA. The DA on the other hand were successful with their "unrelated business" by killing off the Daemon Prince, yet they don't entirely know yet what viper's nest they stepped in as the Daemon Prince and the Interrogator Chaplain didn't manage to fight a challenge and thus didn't introduce themselves properly to each other. For the continuation of the campaign, anything can happen.