2015-11-20

Ballet

Admiral Screed, fanart by Brian-Snook.

+++Incoming transmission
+++ From Bothan Spy network
Imperial flotilla under the leadership of Admiral Screed is moving to to meet with Lord Vader Fleet with a cargo of Spy Drones. It appears that his flagship has the cargo. The fleet will have at least 1 Victory Star destroyer and heavy fighter Escort.
It's imperative to avoid that this cargo reaches lord Vader to stall his effort to find our hidden base in the Outer Rim.
Strike at the waypoint near the Imperial staging point of Corfai in the Core Systems.+++
May the force be with you!+++

I got started off with my friend Francesco to a little campaign in Star Wars Armada. Francesco invented a little background story and now we're taking it from there depending on the results of the battles.

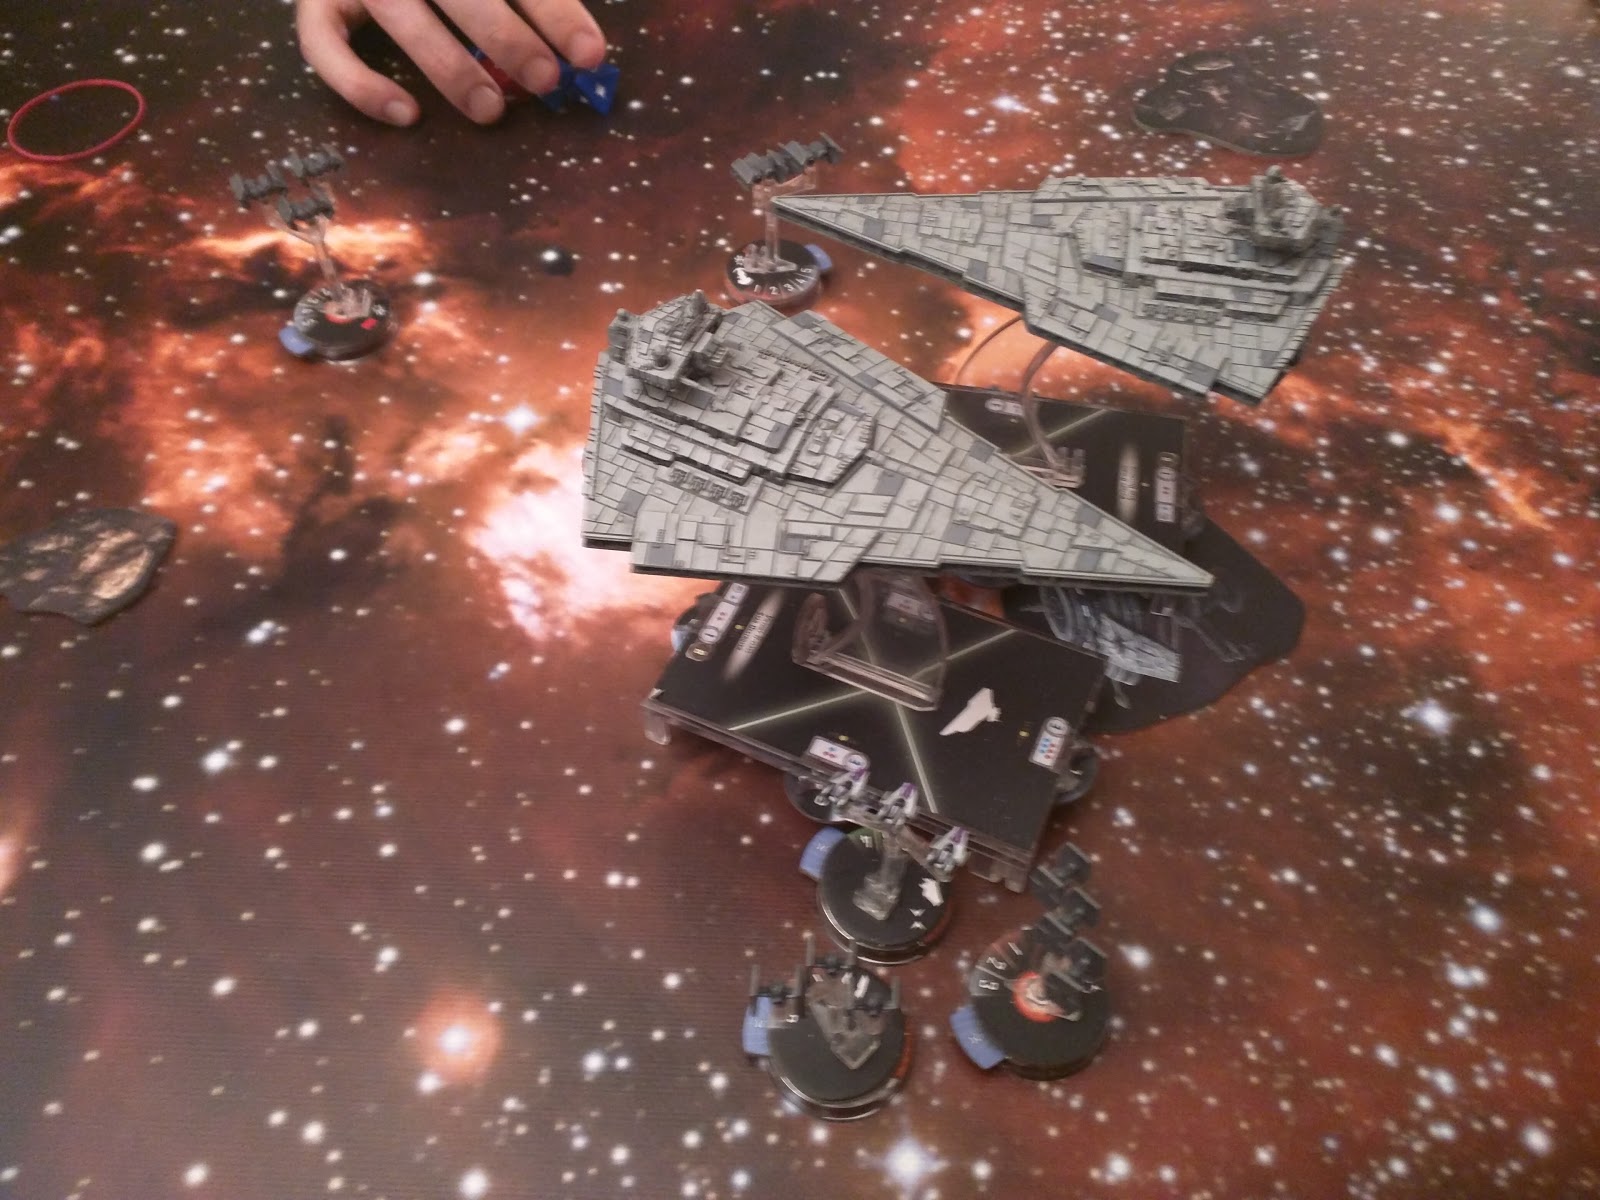
The start of the game. Francesco's Victory class Star Destroyers (VSD) are in the top left and the top right corner. Admiral Screed's VSD in the top left corner first needs to go to the space station at the center and then exit the field through the lower right corner. Because we were playing ambush, Francesco had to set up the Imperials first, but I had the initiative.

Once again the frail Nebulon-B Frigate was supposed to be the anvil on which the VSD has to be crushed.

The end of turn 1. The VSDs were far slower than I thought and I started to worry if I may make it into their backs. Good thing I wasn't going full speed either!

With the gap closing, Screed's VSD coming from the top left tries to shoot the next Corellian Corvette, but she is just barely out of range. I leave it to you to decide if it was luck or skill on my part, but I definitely tried to play my best game.

In the meantime, all TIEs were amassing in the center in one huge blob and both VSDs started to come into the critical range...

...but my Corvettes on the very left finally had the room to flank. Screed surprised me though by reducing the speed of his VSD from 2 down to 1, so it was going to be super tight!

The first shot truly fired goes to Silver Squadron which was supposed to protect the Corvettes, but due to a lack of TIEs nearby it heroically took on Screed's VSD instead.

Once again, the Corvettes did really well because Screed's VSD was only able to fire at them with her broadside.

Up center, half the X-Wings reinforced the A-Wings on their attack against Screed's VSD whereas the remaining two tied down the TIE blob.

So that was the end of turn 3.

Turn 4 saw the activation of the TIEs because of the VSDs' squadron commands. One X-Wing squadron was automatically dead and the other survived with one life left on the dial.

Although I planned in advance and had the Maneuver Command ready, the Nebulon-B had to pass too closely slongside Screed's VSD for my taste. However, the Corvettes both went into her back arc and stripped it of her shields there. The X-Wings and A-Wings took care of her front shields so now Screed's VSD was essentially naked.

The thinning of the Rebel Squadrons in front of Screed's VSD continued since the Rebels decided to ignore the TIEs and concentrate on the mission objective instead. However, now the VSD started to throw around Engineering Commands and restored shields where they were most needed. This was a hard pill to swallow because I still couldn't fire directly into the hull despite previously fully stripping her shields. When you only have three dice to throw, every dice counts.

In this picture, the Nebulon-B Frigate is a goner. I wanted to active her first to bring her to safety, but Francesco asked what good a safe Nebulon-B is in a sector where she can hardly fire at the VSD when the Corvette can throw her full dice (plus I had the Fire Command ready) into the VSD's back. Hence I activated the Corvette first and let the VSD feel her full load, but that was the death sentence for the Nebulon-B as she already had 0 shields on her broadside.

Both VSDs are now heading for the base in the center, but Screed's still has two Corvettes in her back. In the meantime, she couldn't shake off Purple Squadron in front of her either. I still deemed this game winnable despite the loss of the Nebulon-B.

The first Corvette shot and rammed, but because the VSD was still throwing Engineering Commands around, it still wasn't enough to kill it. By now it had lost six out of eight hullpoints and had no significant shields left.

And then disaster struck: just as I was barely out of Francesco's firing range earlier, Screed's VSD moved 2 and now was barely out of the 2nd Corvette's firing range either. These dice would have been necessary to kill the VSD and win the mission.

I got stuck at six damage cards, whereas one card was an open crit.

Being exposed to the fire of two VSDs, the Corvettes died one after the other. Only Purple Squadron still hugged Screed's VSD...

...until Purple Squadron eventually was all that was left.

So how do I look back at the game. I am very happy with the game because of several reasons:

  • it was my first game when I didn't do any major tactical mistakes.
  • hence my battle plan worked as intended and the result ultimately depended on the luck of dice and range.
  • the scenario was great fun.
Ways to improve my game:
  • The Nebulon-B had the Fire Command for quite a few turn when she was still out of range. Rolling Squadron Commands there to take care of the TIE blob would definitely have been more effective. Maybe I should think of my Nebulon-B as less of a firing base and more as a squadron support base.
  • I had Engine Techs on all my ships, but forgot to use them throughout the entire game... had I remembered them, the game could have turned out quite differently because of me making those few critical inches.

2015-11-17

Reinforcements have arrived

It was time to paint the final batch of squadrons to have a full 300pts list available.

First I did two more X-Wings for a total of six squadrons. However, the longer I play them, the more I like their versatility so I don't mind having that many. So here we have Yellow and Orange Squadron.

Next up the A-Wings. I need them to escort my Corellian Corvettes. To my surprise, you can see the silver stripes on the photograph much better than in real life. So here we have Silver and Purple Squadron.

Then we have the Y-Wings. I'll eventually swap one or two X-Wings in my list for those. So here we have Orange and Gold Squadron.

Last but not least the B-Wings. I had them brownish in my memory although an image search showed they're just the same metallic grey. I overdid it here by adding a second wash for contrast and then directly highlight with Desert Yellow, but I like the Native American vibe it gives to them. So here we have another Orange and Yellow Squadron.

2015-11-09

The battle of n00bs

Me and Armando having a good time before the game already. On the very left Armando's opponent he beat in the previous round.

Last Saturday I got to meet Armando, a great guy to roll dice with. Both he and I are new to Star Wars Armada, so we're about on the same skill level - and he is a devout Imperial player as much as I would never desert the Rebels, so this promised a good match.

We play the Space Station mission (near the Victroy Class Star Destroyer). My goal is to lure Armando's fleet there and use the front of my Nebulon-B Frigate as the anvil and the Corellian Corvettes swinging in through the center to his right flank as the hammer.

Setting up the trap.

Everything works as planned and the Corvettes move into the Star Destroyers' rear field. The two squadrons of TIEs defending it are effectively dealt with by the A-Wings. So far everything is moving according to plan.

In the meantime, the Nebulon-B is slowly moving in...

...sending in its X-Wing squadrons first. Luke Skywalker gets to make a shot on the VSD right flank with no shields, but his torpedo misses! After that the TIEs move in and tie down the rebel squadrons with their TIE Advanced.

After that, the VSD almost rams the Nebulon-B. This was the point that cost me the game, I should have had the Nebulon-B speed up by having a Maneuver Command on her dial. However, this way she was fully exposed to the VSD's broadsides and was about to die soon.

My last ace was the Corellian Corvette following up the VSD's rear, but although she had effectively speed 5 she just managed to catch up, but couldn't fire her laser banks in this round.

And so the Nebulon-B was gone.

The 2nd Corellian Corvette closed in instead and rammed the VSD. Both took damage, but it wasn't enough to run down the VSD's hull points. While his first five hull points seemed to go off easily, the last three were a major uphill battle.

The Corellian Corvette in the VSD's rear finally fired and wrecked the Victory Star Destroyer. However, the Gladiator was still a major threat, especially since it still had almost full shields.

The white Corvette started to pursue now the Gladiator, which turned out to be a mistake. The Corvette's firepower wasn't enough to bring it down...

...and the Gladiator instead made short work of the black Corvette that previously rammed the VSD and was all but dead.

I collected quite a few points by blowing up the Victory Star Destroyer and all those TIE squadrons, but in the end Armando won with a lead of roughly 30 points. This game perfectly illustrates two lessons every Rebel player should learn - and especially me by now:


  1. Don't ever fly close to a Star Destroyer - black dice kill. Consider the Star Destroyers' movements and their attempts to ram you, even when they are slow. The Maneuver Command is your best friend in 80% of all cases. You need to compensate your lacking shields with speed.
  2. Always activate the ships first that are almost dead. That way they at least get to fire their laser banks  one last time.

SWA: How to paint X-Wing Squadrons

The source of envy - X-Wings for Star Wars Armada painted by fellow blogger Ica.

Recently, among me and my friends Star Wars Armada got really big. As I have little to no money left for wargaming, I was lucky enough to receive the rebel models from my buddy Sven's starterbox. That being said, I wanted to paint them up nicely yet efficiently.

In terms of painting tutorials for Star Wars Armada, I didn't find a tutorial I found helpful for myself. On the one hand there's this super awesome painting tutorial by Ica that produces awesome squadrons, but this is beyond my skill level and not efficient enough for these models. (I am sorry to say it, but their quality when compared to other game companies isn't the greatest and they're so tiny that I don't wanna waste hours to paint them in detail. They are good enough for the price tag they come with, though.) On the other hand I have found some really basic painting tutorials that made me think "ok, I don't want mine to be that simple".

So here is my stripped down painting tutorial which uses Ica as an inspiration, but is meant for the artistically challenged like myself.


Step 1: basecoat the model with a white primer spray.

Step 2: prepare your palette. You don't need many colors, mostly light grey, white black, and a black wash.

Step 3: basecoat the model light grey. (I am painting here Luke Skywalker's Red Squadron because everyone among the local Imperial players hates him the most.)

Step 4: do the black wash.

Step 5: apply the same light grey paint again. However, now you should really focus on painting only the "easily accessible" areas so you don't remove the shadows you previously generated with the black wash.

Step 6: apply black paint to paint the cockpit windows and a black nose. (yes, I suck at freehands, too)

Step 7: tidy up your model with the same light grey paint again. On the nose, the X-Wing should now have only a small black lining and the tiny light grey frames should further define the cockpit.

Step 8: apply the white paint (they are flying for the good guys after all), but use a tiny bit more water than usual to water down your paint. If you are after a war torn spaceship, you don't want a pearl white spaceship. Applying a little more water when mixing up your white paint helps the grey areas to shine more through.

Step 9: add decorations and you are done.

This is how they look on their rear.

Overall painting time for this job was three hours on a Sunday night. I am a relatively slow painter, but I still believe I did something that both looks good and is efficient to paint.

From the very back in clockwise order: Red Squadron, Blue Squadron, Gold Squadron, Green Squadron.